The filtered tap is running more slowly, the replacement reminder has popped up, and there's no spare cartridge in the cupboard. You open the door under the sink and find a filter housing you haven't touched since it was installed. Before reaching for a wrench, identify the cartridge and work out how to isolate the water.
A straightforward water filter replacement under sink starts with the right part and finishes with a dry, pressure-tested installation. The important work happens around the cartridge: releasing pressure, keeping the outlet clean, checking the seal and flushing properly. Don't judge the job by whether the new cartridge screws into place.
Tools, Cartridge Match and Costs Before You Start
Leave the isolation valve alone until the replacement is ready. Photograph the housing label and record the cartridge model, connection or head size, and whether the system has separate filtration stages. If the label is unreadable, ask the supplier to identify it from photographs rather than buying something that looks similar.
Gather the following before clearing the cupboard:
- Suitable wrench: Use the manufacturer's cartridge wrench where specified. Keep an adjustable wrench for appropriate fittings, not for gripping a plastic bowl.
- Water protection: Put a towel, shallow tray and bucket within reach.
- Cleaning supplies: Have a clean, lint-free cloth ready for the sealing surfaces.
- Approved lubricant: Choose food-grade silicone lubricant only if the manufacturer approves it for that seal and drinking-water application.
- Torch: Light the back of the housing and the connections above it.
Match the part before comparing prices
Check the opening method in the instructions. A hand-operated twist-lock cartridge isn't the same as a threaded bowl that accepts a dedicated housing wrench.
AquaSafe's cartridge range lists basic replacements from approximately AUD 15, with advanced under-sink or whole-house cartridges costing AUD 100 or more.
| Cartridge type | Typical cost (AUD) | Best fit | Check before buying |
|---|---|---|---|
| Basic replacement cartridge | From about 15, as cited above | Compatible single-stage taste and odour applications | Exact model and housing connection |
| Advanced under-sink cartridge | 100 or more, as cited above | Compatible multi-stage systems or targeted treatment | Independent evidence for each contaminant claim |
| Manufacturer-branded cartridge | Confirm with supplier | Original-system compatibility | Model, price and warranty conditions |
Manufacturer branding doesn't replace a compatibility check or guarantee a warranty outcome. Use the replacement cartridge selection guide alongside the original instructions, then put the confirmed parts on the bench.
How to Replace the Cartridge Step by Step
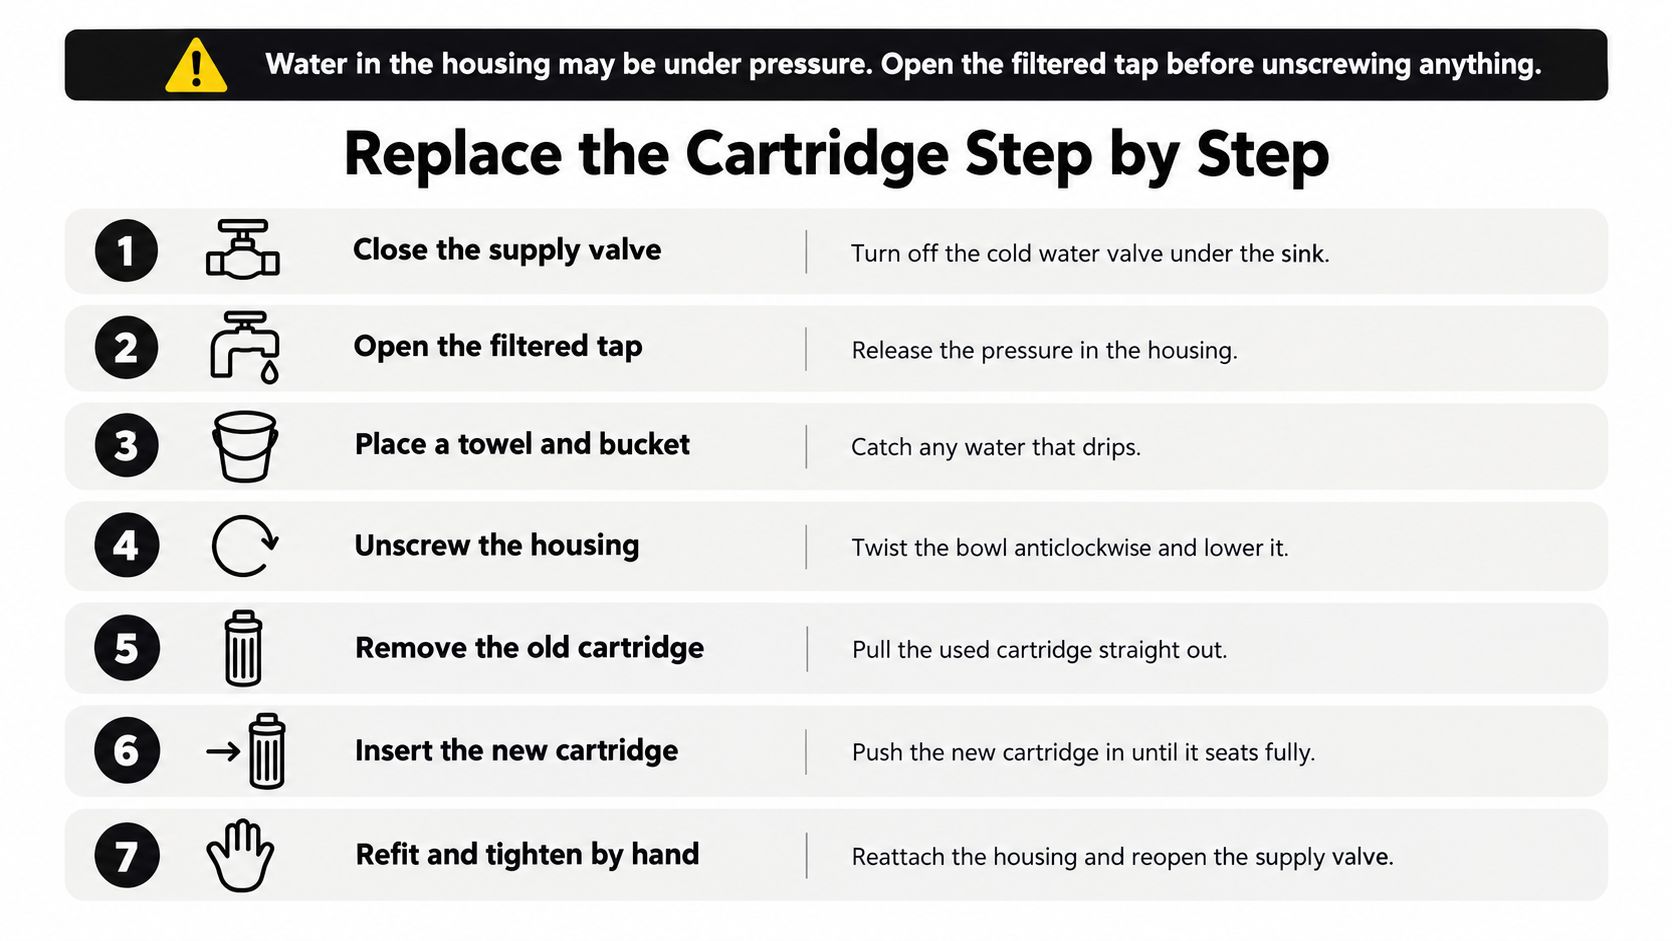
A cartridge change can turn into a leak if the housing is opened before the supply is isolated or the seal is seated incorrectly. Keep the manufacturer's instructions beside you, and stop if you cannot confirm that the water is off.
Isolate and open the housing
Close the cold-water isolation valve. Check that it supplies the filter, not a nearby appliance. Don't force a seized valve. If you're unsure whether it has shut off the water, keep the housing closed.
Open the filtered tap to release pressure. Let water drain until the flow stops. If it continues, the supply may still be on. Don't loosen the housing.
Place the towel and tray under the housing. Keep the tray close enough to catch the bowl as you remove it. Pressure release does not empty the housing, so expect some water to spill.
Release the bowl or cartridge according to the system instructions. Support the housing from underneath. Use the specified housing wrench only if the manufacturer allows it. If the assembly resists controlled pressure, stop. Twisting the pipework or mounting bracket can loosen other joints.
Remove the used cartridge without touching the clean outlet. Lower it into the tray. Keep water from the old cartridge away from the replacement, and set the new one on a clean surface rather than the cupboard floor.
Inspect and reassemble
Check the O-ring and sealing surfaces. The O-ring is the flexible ring that seals the housing joint. Wipe it and its groove with a lint-free cloth. Replace a split, flattened or damaged ring with the specified part. Tightening harder will not repair a faulty seal.
Use lubricant only if the manufacturer approves it. Apply the specified food-grade product and amount. Petroleum jelly and general-purpose grease are not substitutes. A silicone label alone does not confirm that a lubricant is suitable for this seal or drinking-water use.
Fit the correct cartridge in the marked orientation. Follow the flow arrow, locating spigot or stage markings, and remove packaging as directed. The cartridge should sit squarely. If it needs force or appears crooked, check the model and alignment before continuing.
Refit the housing or cartridge head by hand. Start threaded parts squarely so the threads engage properly. Stop if they bind. Don't use a wrench to force the joint closed, since overtightening can damage the assembly or seal.
Reopen the isolation valve slowly. Watch the bowl joint, housing head, tubing and nearby fittings as pressure returns. If water escapes, close the valve and release pressure again before adjusting anything.
Practical rule: A sound seal depends on the correct parts being clean, aligned and seated. Extra force can damage the housing.
If there is no local isolation valve, use the main cold-water shut-off only if you can identify and operate it safely. Tell other occupants before interrupting the supply, then check at the filtered tap that pressure has released. After restoring the supply, open the nearest suitable cold tap to clear trapped air.
For a boiling or chilled-water appliance, follow its own shutdown and cartridge-change instructions. These units may have powered components, so don't treat them as ordinary cold-water housings.
The video shows another view of the replacement process. Keep the instructions for your specific system nearby as you work.
The cartridge still needs its specified flush before drinking. Follow the manufacturer's procedure for the new cartridge.
How to Flush, Test and Log the New Cartridge
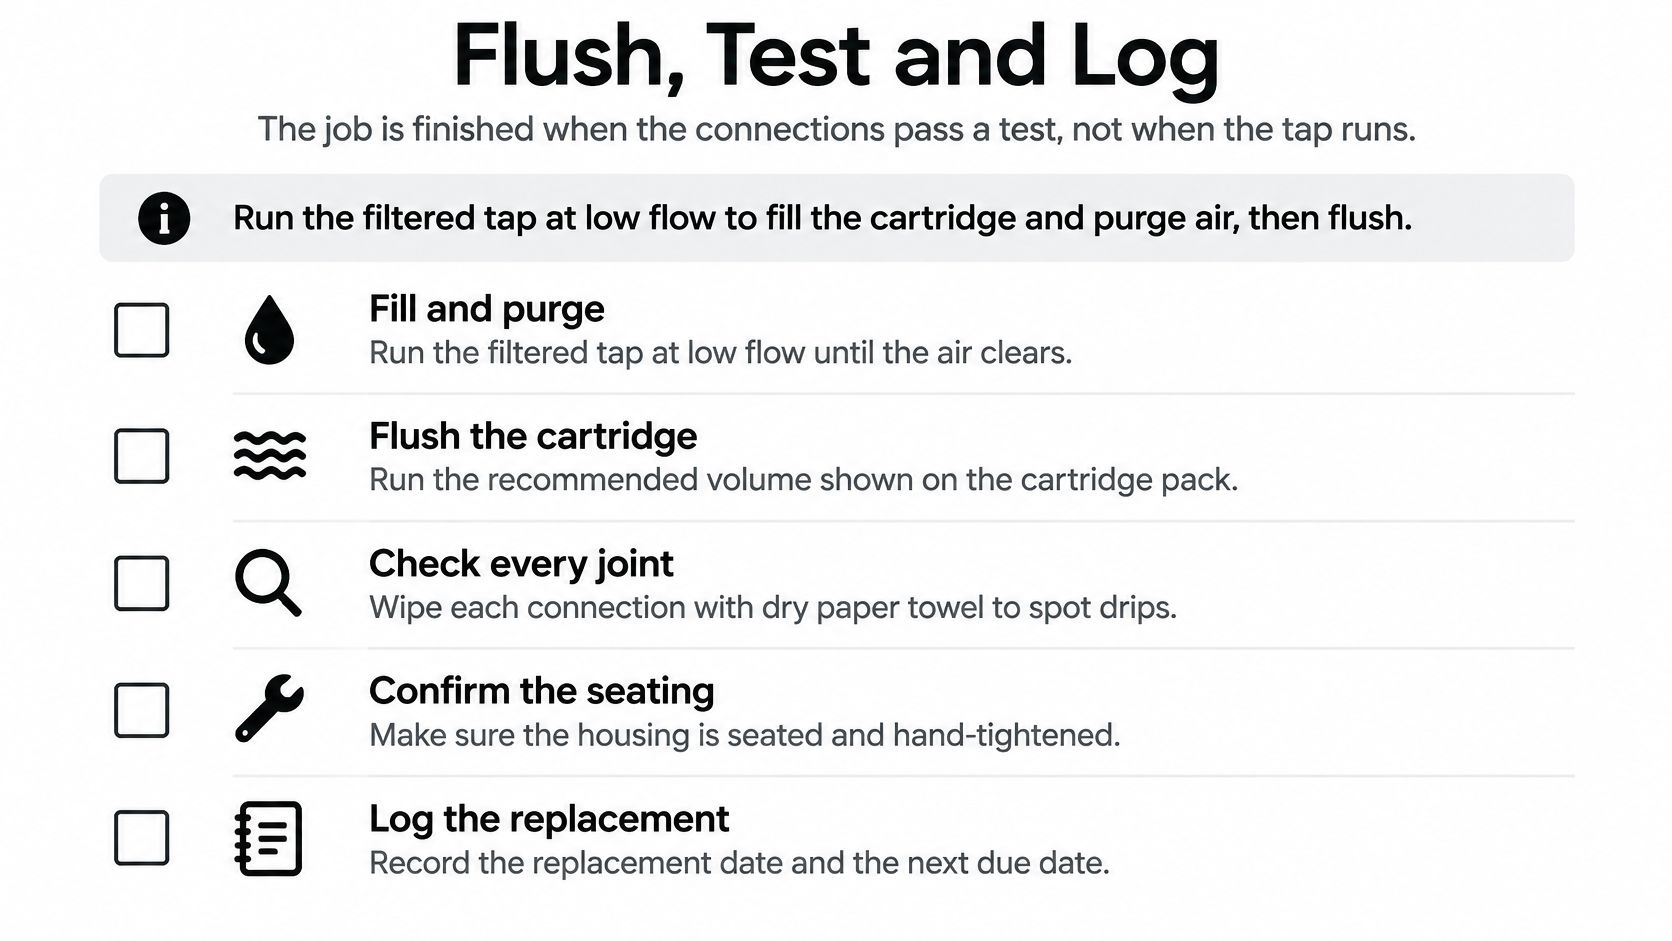
The job isn't finished when water comes out of the tap. It's finished when the cartridge has received its specified flush and the connections remain dry under pressure.
Follow the manufacturer's start-up procedure. Where directed, begin with a gentle flow to fill the cartridge and clear air, then discharge the full specified flushing volume to drain. Use a measuring jug if needed to track that volume rather than guessing from how clear the water looks.
Check under working pressure
Dry each connection with clean paper towel. Close the filtered tap so the installation sits under normal supply pressure, then inspect again for fresh moisture. A dry joint while the tap is running isn't enough to close the cupboard.
Use the checklist to keep the checks separate.
| Check | Pass looks like | Next step |
|---|---|---|
| Connections under pressure | No fresh moisture on dry paper after rechecking | Use the leak troubleshooting below |
| Flow rate | Consistent with the system's expected performance | Complete flushing, then investigate persistent slow flow |
| Flush volume | Manufacturer-specified volume discharged | Keep flushing and don't drink yet |
| Taste and smell | No unexpected lingering taste or odour | Follow the taste troubleshooting below |
| Log entry | Date, model, flow and taste recorded | Complete the record before closing the cupboard |
Compare flow sensibly. A replacement may behave differently from the exhausted cartridge, so the previous flow isn't an absolute performance standard. Equally, acceptable taste doesn't prove contaminant removal.
Make the record useful
Write down the installation date, exact model, flushing completion, flow observation and any taste change. Add the next maintenance date from the manufacturer's instructions, not from memory.
Keep the cartridge label or a clear photograph with the maintenance record. The next replacement should start with an identified part, not another search under the sink.
If any acceptance check fails, stop using the filtered water. For a leak, isolate immediately; for a flow or taste problem, investigate using the procedure below before returning the system to drinking-water service.
Fixing Leaks, Slow Flow and Taste Changes
A fresh drip at the housing deserves attention before it reaches the cupboard base. Don't leave a towel underneath and assume the joint will settle. Identify where the moisture starts, because water from a connection above the bowl can run down and make the bowl seal look responsible.
The symptoms below are inspection prompts, not confirmed diagnoses. Check the actual assembly before buying another cartridge or dismantling unrelated fittings.
Start with the seal and seating
For a housing-joint leak, isolate and depressurise using the earlier procedure. Inspect the O-ring for correct placement and damage, then check that the housing threads start squarely. The O-ring itself isn't cross-threaded; the threaded bowl or head can be.
If water starts at the tap or its connecting tube rather than the housing, use the water filter tap leak guide to narrow down the location. Don't undo several fittings at once, because that makes it harder to tell which connection caused the problem.
| Symptom | Likely cause to investigate | Fix |
|---|---|---|
| Drip at the housing after replacement | Misplaced or damaged O-ring, or misaligned housing threads | Isolate, inspect and reseat correctly |
| Slow flow straight after replacement | Incomplete start-up, cartridge seating or valve position | Complete the specified flush and check the installation |
| Flow remains low over time | Cartridge loading or an inlet restriction | Review the maintenance record and assess the supply |
| Black specks or grey fines | Possible new-cartridge material, depending on filter type | Follow the flushing instructions and seek advice if persistent |
| Chlorine or plastic taste after flushing | Incorrect cartridge, remaining packaging or installation issue | Verify the part and installation before further use |
| Leak returns after correct reseating | Damaged seal, housing or head | Stop tightening and arrange replacement or assessment |
Don't turn uncertainty into more force
For slow flow, start with checks you can verify without disturbing plumbing: the model number, correct stage, completed flush and isolation-valve position. If these are right, ask the supplier about the cartridge's expected performance. Don't assume a new cartridge is spent just because the tap is slow.
Unexpected specks need the same discipline. Check whether the manufacturer describes initial flushing residue for that cartridge. If the material continues after the specified flush, stop drinking the water and seek advice rather than flushing indefinitely.
A persistent taste also needs investigation, not masking. Check that protective packaging has been removed exactly as instructed and that the cartridge is fully seated. If there's a source-water concern, reseating alone won't resolve it.
Stop point: A returning leak calls for inspection or a replacement part, not another tightening attempt.
A damaged housing, an unreliable isolation valve or a leak you can't locate is a reason to call a licensed plumber. Keep the system isolated until the fault is resolved.
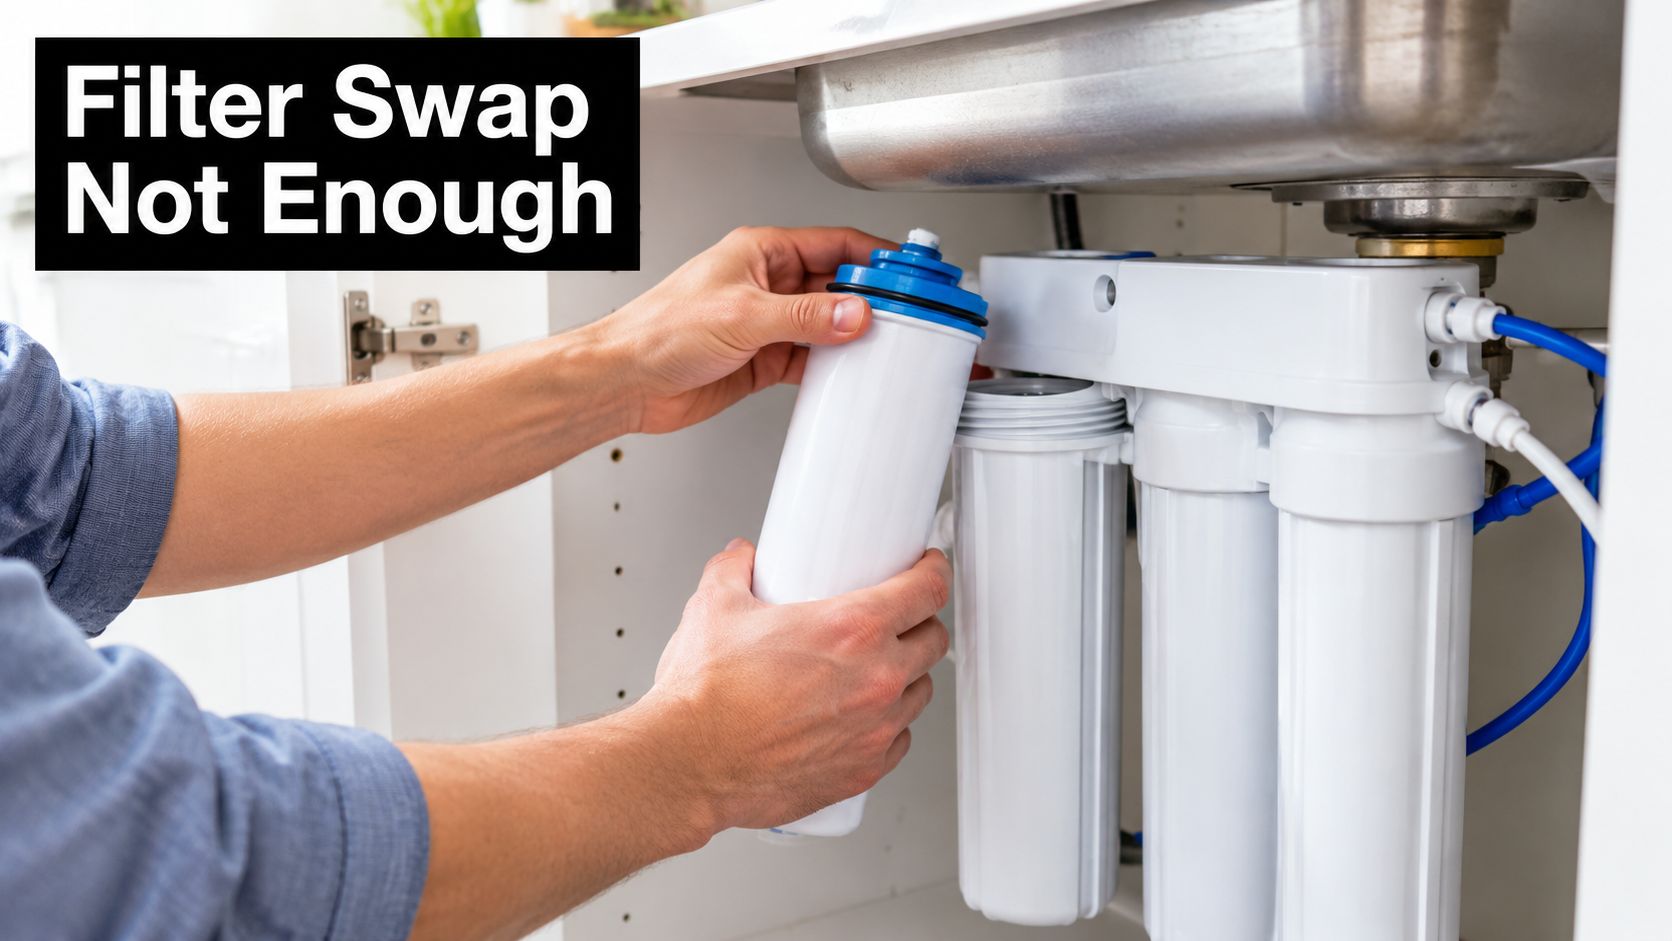
When a Filter Swap Is Not Enough for PFAS
A fresh cartridge doesn't automatically remove PFAS. The relevant question is whether that exact cartridge has independently validated reduction performance for the contaminant you're concerned about, in the system where it will operate.
On 25 June 2025, NHMRC revised Australian drinking-water guideline values to 8 ng/L for PFOS, 200 ng/L for PFOA, 30 ng/L for PFHxS and 1,000 ng/L for PFBS, while stating that most Australians face low health risk from PFAS in drinking water and that implementation sits with states, territories and water providers, as explained in its PFAS guideline review.
Check the need before the product
Distinguish a municipal supply meeting applicable guidance from a property with a specific contamination concern. In the former case, a filter may be an optional choice for taste or convenience. In the latter, buying a cartridge without assessing the water leaves the important question unanswered.
Make these checks before choosing treatment:
- Local water information: Read your provider's latest water-quality information for the relevant contaminant. Ask the provider if the report doesn't answer your question.
- Exact reduction claim: Request independent performance evidence for the cartridge and system combination. Broad words such as purification aren't contaminant-specific proof.
- Operating limits: Confirm rated life, replacement requirements and the conditions attached to the reduction claim.
The water filter system comparison can help organise product options, but it doesn't replace local water information or validation documents.
Treat filtration as part of an assessed response, not a permanent answer to raised metals or other hazards. A cartridge can only be selected sensibly once the concern is identified.
If your utility information or a property-specific assessment raises a concern, arrange appropriate testing and professional advice before purchasing. Don't choose on taste, cartridge colour or an unqualified promise to remove everything.
Set Your Next Change Date and Dispose Correctly
Use the manufacturer's rated life as the starting point for your next change date. The Australian health guidance cited earlier doesn't set a universal replacement interval. It calls for inspection, maintenance and replacement according to the manufacturer, because neglected filters can support bacterial growth and release organisms into treated water.
Set a calendar reminder from the installation record. Include the cartridge model in the reminder so you can order the correct replacement before opening the cupboard.
Review condition as well as the calendar
A maintenance date isn't permission to ignore a change in performance. Recheck sooner after a noticeable flow reduction, unexpected taste or failed acceptance check. Heavy rain also warrants attention where the supply is vulnerable to changes in source-water quality.
Use the log to identify a pattern, not to diagnose the cause by itself. If performance falls away earlier with each replacement, ask whether the cartridge selection, incoming water or installation needs assessment. Shortening the interval alone may leave the underlying problem unresolved.
- Record the condition: Note what changed and whether it occurred suddenly or gradually.
- Check the instructions: Follow any earlier-replacement triggers specified for the system.
- Escalate unresolved faults: Seek supplier advice or a licensed plumber rather than repeatedly dismantling the housing.
Contain the spent cartridge
During removal, follow the isolation and spill-control procedure already described. Let the used cartridge drain into the tray, then contain it for disposal so it doesn't leak through the house.
Check the manufacturer's take-back options and your council's accepted waste streams. Use household waste only where permitted; don't assume a mixed-material cartridge belongs in kerbside recycling. Never empty filter media down the sink.
Clean a reusable housing only with products and methods approved by its manufacturer. Rinse as directed, keep the clean outlet protected and avoid leaving cleaning residue behind.
If a leak or flow fault persists after correct reassembly and testing, leave the system out of service and arrange help. Set the next reminder from your log today, while the model and installation details are still in front of you.
Ring Hot Water supplies replacement filtration cartridges and genuine spare parts Australia-wide, with installation, repair and maintenance services across Melbourne. Visit Ring Hot Water with a photograph of your system label and cartridge model to ask about a compatible replacement or help with a persistent leak or flow fault.