You're standing at the kitchen sink with a glass that tastes different from the water you prefer, wondering whether a filter will screw straight onto the tap. Then you look underneath and find flexible hoses, unfamiliar connectors and a cupboard already crowded with cleaning products. Choosing a water filter for sink faucet use starts with that plumbing, not the cartridge label.
A workable installation needs the tap, fittings, water pressure, treatment claim and replacement routine to agree. For Melbourne households, the practical aim is a filter that addresses a clear concern, fits without improvised connections and remains accessible when it needs servicing.
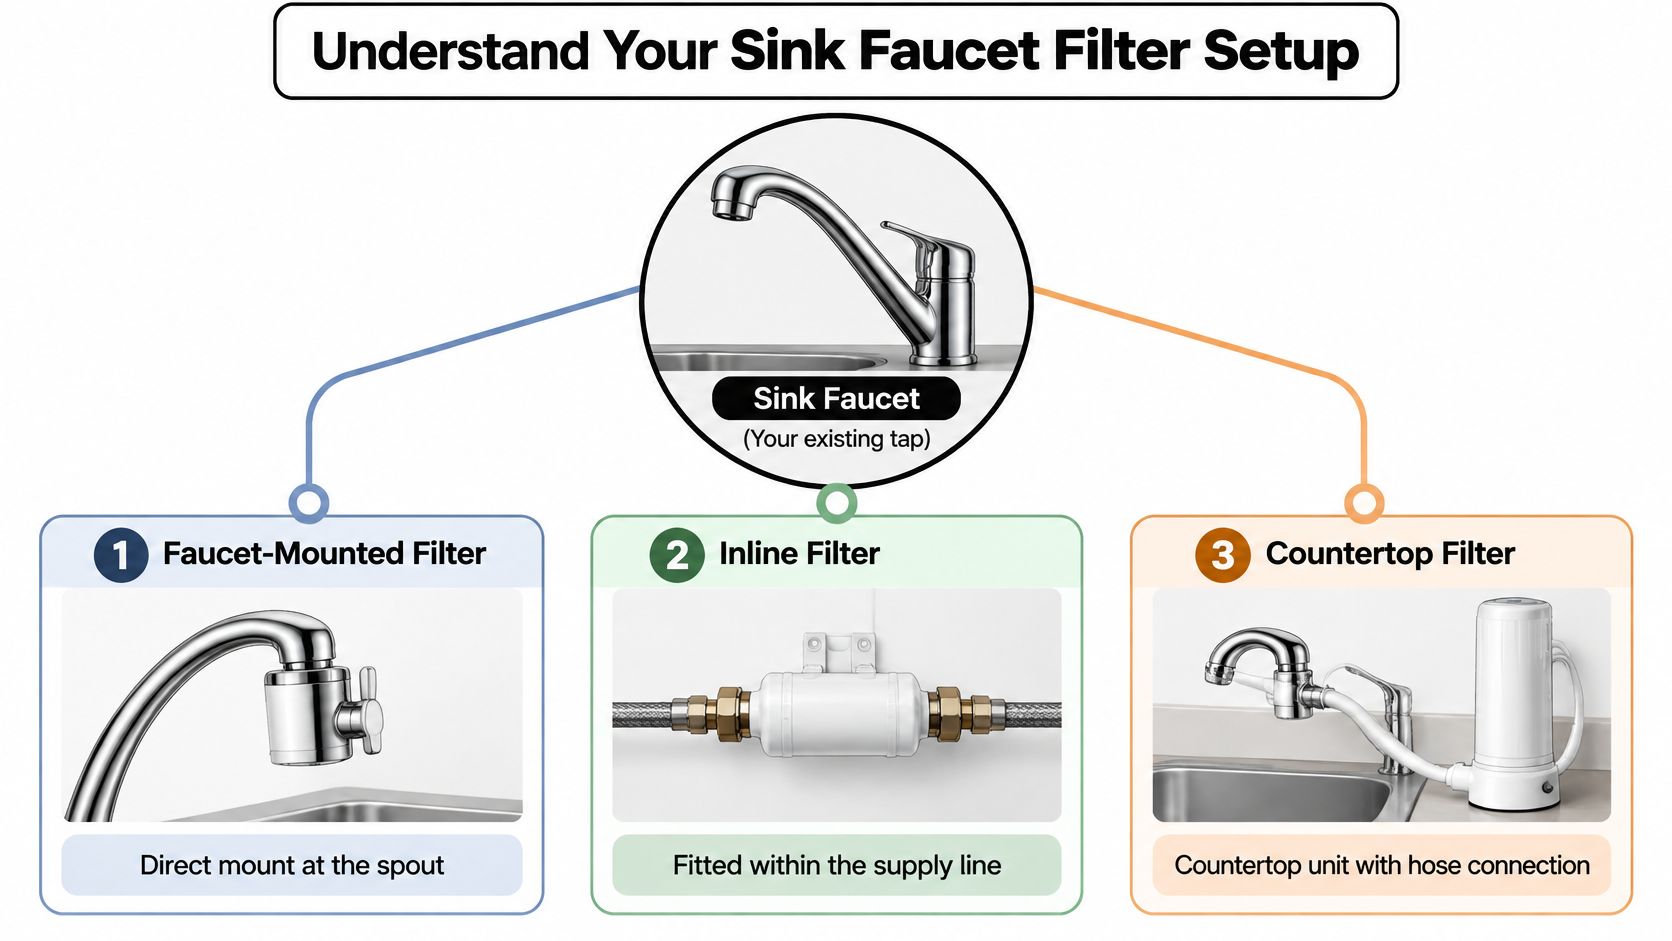
Understand Your Sink Faucet Filter Setup
The existing tap usually determines how much work you're considering. A fixed spout with a removable outlet fitting presents a different job from a pull-out mixer with an integrated spray head and proprietary quick connection. Don't assume an adapter will suit either arrangement because it looks close.
A faucet-mounted filter attaches directly at the outlet. You operate its selector as the manufacturer directs and change the cartridge above the sink, so check clearance for washing dishes and filling containers.
An inline filter sits within an approved water path, such as the cold supply feeding a compatible tap. Some arrangements involve an outlet hose, but an integrated pull-out hose isn't automatically a suitable connection point.
Recognise the complete water path
An under-sink filter with a dedicated drinking-water tap keeps the filter below the bench and gives drinking water its own outlet. That arrangement needs access for cartridge removal and a suitable tap mounting position. Countertop units offer another layout, with a hose between the faucet connection and a unit beside the sink.
Use this diagram to distinguish the mounting positions before choosing hardware.
Before buying, inspect the kitchen with these questions in mind:
- Connection identity: Can you confirm the pipe or tubing diameter, thread format and connector type?
- Service clearance: Can the housing open without removing shelves or disturbing adjacent hoses?
- Daily operation: Will you use the existing mixer, a selector or a separate drinking-water tap?
- Installation disruption: Are you prepared for plumbing alterations or a new mounting opening?
This is generally a point-of-use decision, not a replacement water supply. In March 2004, 93% of Australian households were connected to mains or town water, according to the ABS household water-supply findings. That historical context doesn't establish the condition of your particular kitchen plumbing.
Choose the Right Filter and Connection
Choose the treatment objective before the cartridge. A household wanting less noticeable chlorine taste has a different purchasing decision from someone investigating lead, PFAS or another verified contaminant. For a health-related concern, start with local supplier information or appropriate laboratory testing rather than guessing from taste.
Ask for the performance documentation covering the exact cartridge and system you're considering. A certification logo without an identifiable claim doesn't tell you whether the product addresses your concern.
Compare the installation rather than the packaging
Comparing common sink filter arrangements
| Arrangement | Typical position | Main reader need | Connection check | Service consideration |
|---|---|---|---|---|
| Faucet-mounted | Existing spout outlet | Filtered water without a separate outlet | Spout profile, adapter and manufacturer compatibility | Cartridge access above the sink |
| Inline | Approved supply or hose connection | Treatment through a compatible existing outlet | Tube diameter, fitting format and approved location | Reachable isolation and filter access |
| Under-sink | Below the bench, feeding a drinking-water outlet | A separate drinking-water path | Supply connection, outlet tubing and tap mounting | Housing removal and room for servicing |
Use a water filter system comparison to narrow the arrangement, then compare the actual installation manuals. The useful question isn't which housing looks most substantial, but which system suits the outlet, demand and servicing access.
Check rated flow, operating pressure, cartridge capacity and replacement interval together. If the intended outlet demands more flow than the filter permits, choose a compatible arrangement rather than assuming you can operate outside its rating. Also confirm that replacement cartridges remain identifiable by model.
Separate construction requirements from treatment evidence
Standards Australia's drinking-water treatment guidance explains that AS 3497:2021 sets minimum construction, installation and testing requirements, while performance claims should be certified against applicable NSF/ANSI protocols. The same guidance identifies AS/NZS 4020:2018 for suitability of materials in contact with drinking water.
Those checks serve different purposes. Suitable materials and sound construction don't establish that a cartridge reduces every contaminant.
Selection rule: A chlorine-taste claim isn't evidence of PFAS, lead, microbial or hardness reduction. Accept only the independently certified treatment claim that matches the job.
Have a licensed plumber assess alterations to fixed plumbing, uncertain pressure conditions or unfamiliar supply connections. An experienced installer can help identify hardware, but that doesn't replace licensed plumbing work where required. If compatibility depends on forcing a thread, stacking uncertain adapters or modifying a proprietary hose, stop and resolve the specification first.
Prepare Tools, Parts and Plumbing
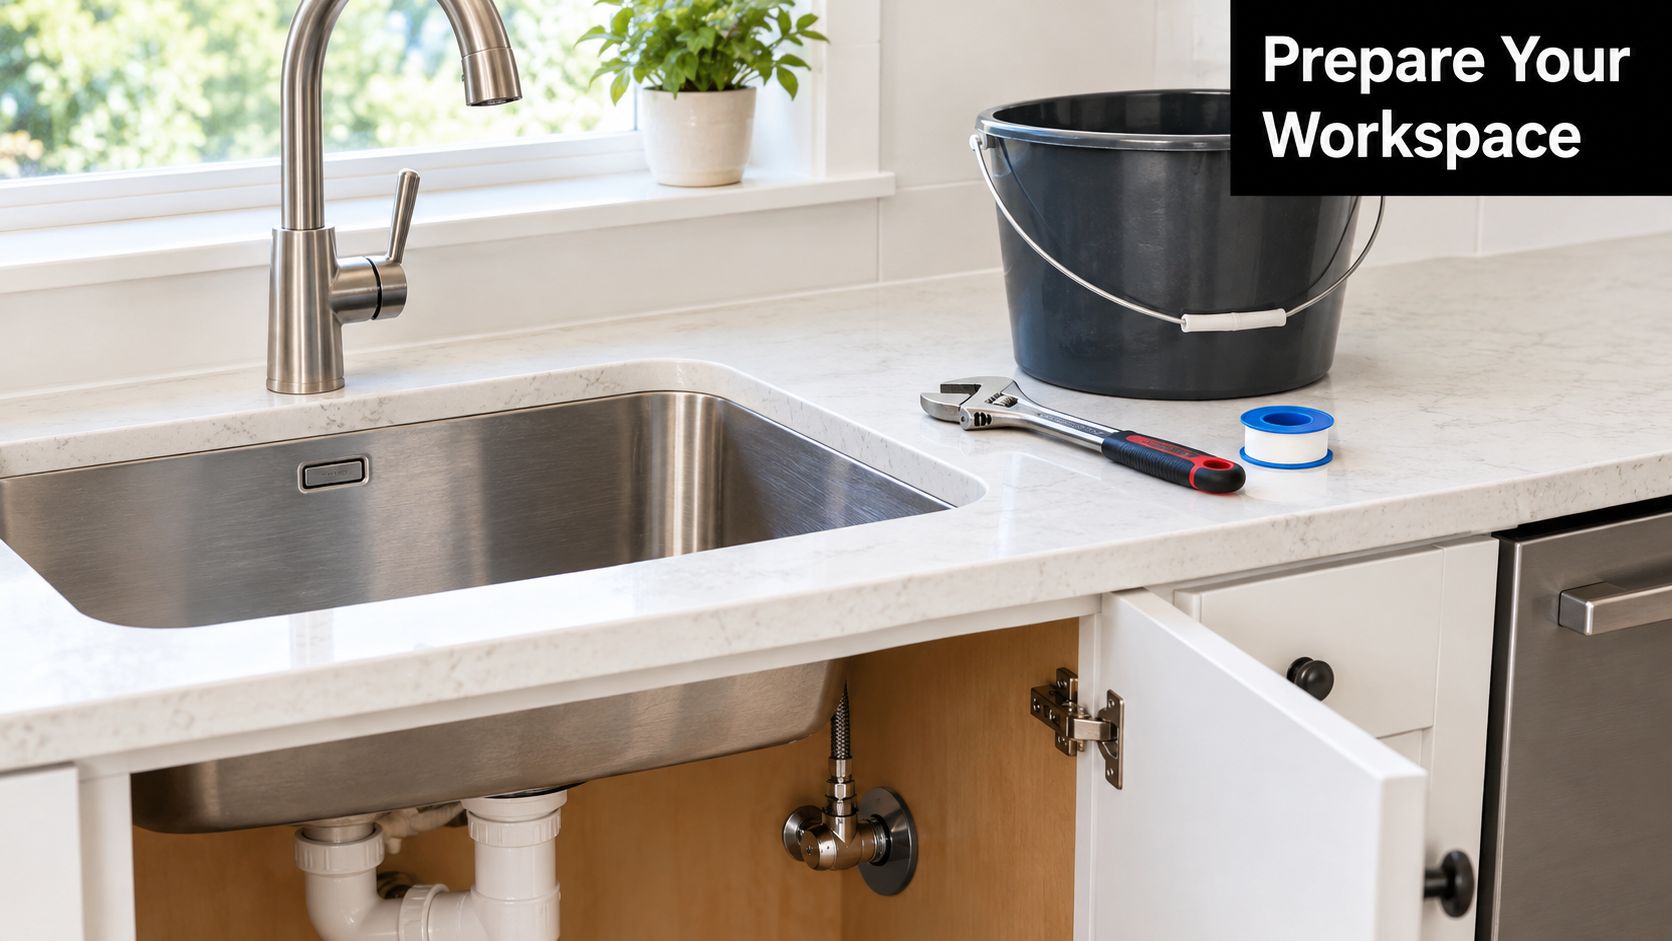
Clear the cupboard before loosening anything. Remove stored items, protect the cabinet base and put a bucket or shallow container beneath the proposed connection. Keep a cloth nearby so you can distinguish fresh water from an old spill during later checks.
Identify how you'll isolate the relevant supply and confirm you can operate that valve. A seized, damaged or inaccessible shut-off is a reason to arrange plumbing assistance before opening the system.
Gather only the tools your installation requires, using the manufacturer's instructions as the reference.
Identify how each joint seals
A compression connection typically uses a nut and a compression component around the tube. A push-fit connection accepts compatible tubing into a retaining and sealing assembly. A threaded connection may seal at the thread, or it may use a washer or O-ring at a separate sealing face.
That distinction matters. Tape isn't a universal cure, and a threaded nut doesn't necessarily mean the thread itself needs sealing material.
- Tools: An adjustable spanner, screwdriver, bucket and cloth may be useful. Follow any requirement for a tube cutter or fitting-specific tool.
- Filter parts: Check the body, correct cartridge, mounting hardware and specified seals or O-rings.
- Connection parts: Confirm adapters, tubing, inserts, reducers and retaining clips against the installation instructions.
- Dimensions: Verify tubing outside diameter and fitting specifications rather than judging size by appearance.
Ring Hot Water is one specialist supplier of genuine filter accessories, including John Guest and brass threaded fitting categories. Its water filter hose fittings guidance can help frame the parts enquiry, but category names alone don't establish model compatibility.
Put the proposed parts beside the connection before dismantling it. If you can't explain how each joint seals, you're not ready to assemble it.
Keep new components clean and leave seals protected until needed. Don't substitute a similar-looking O-ring or reuse damaged tubing just to finish the job with what's available.
Install the Filter with the Right Method
Isolate the relevant water supply, then operate the outlet to release pressure and confirm that flow stops. Don't open a pressurised housing or loosen a supply connection while water continues running. If isolation doesn't work, leave the connection intact and have the valve assessed.
Use the sequence below as an overview, with the filter's own instructions governing the actual assembly.
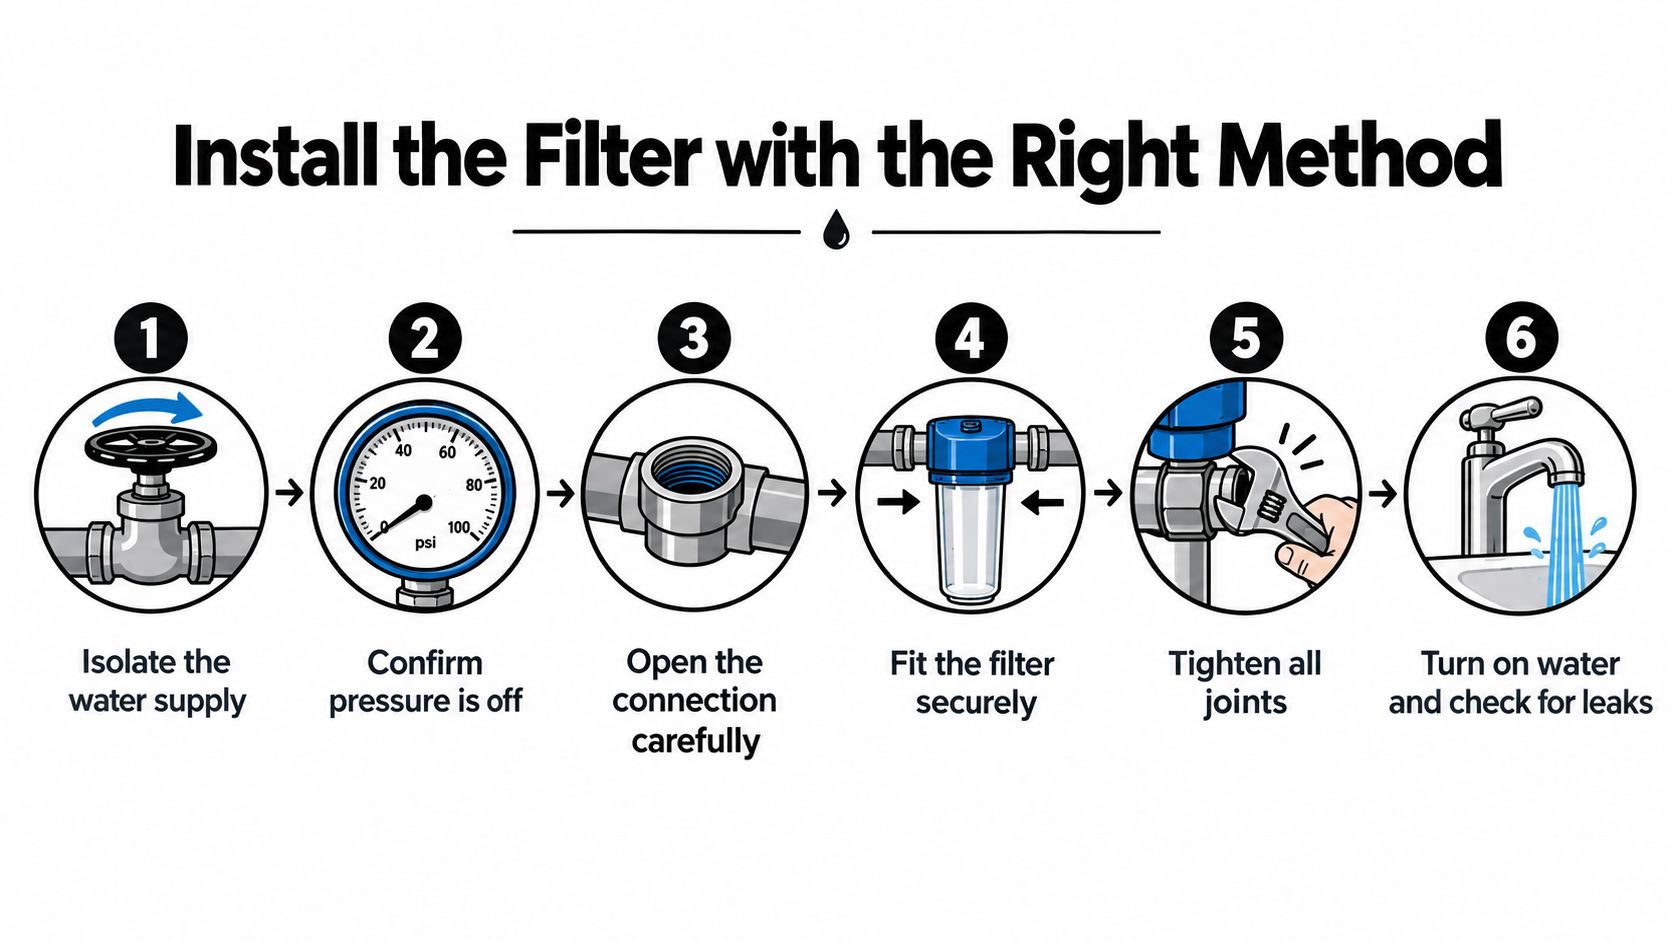
Fit the arrangement you actually have
For a faucet-mounted filter, remove the existing outlet component only as the tap manufacturer permits. Clean the mating surface, identify the correct adapter and fit the specified washer. Start the connection carefully by hand and stop if the adapter sits crooked, binds or fails to engage properly.
An inline installation requires a manufacturer-approved location in the water path. Confirm which side supplies water and which side feeds the outlet before connecting anything. Secure the filter as directed so its weight doesn't hang from the tubing.
For an under-sink drinking-water system, position the housing where the cartridge can be removed without pulling on neighbouring plumbing. Have the supply branch and dedicated tap installed appropriately, with drilling or fixed-plumbing alterations handled by the relevant tradesperson. Don't drill a benchtop because there appears to be space above it; inspect the underside and confirm the material-specific method first.
Match the connection technique
For push-fit hardware, use the specified tubing material and size. Prepare a clean, square tube end, inspect it for damage and fit an insert only where the fitting instructions require one. Follow the manufacturer's insertion-depth guidance, seat the tube fully and perform the prescribed gentle retention check.
For compression fittings, assemble the correct nut and compression components in the stated order. Keep the tube aligned and tighten according to the fitting instructions, supporting adjoining hardware so it doesn't twist.
For threaded joints, clean and inspect the thread and sealing face before assembly. Apply an approved sealant only where the joint design requires it. Washer-sealed connections need the correct washer, not extra tape intended to compensate for a missing or damaged seal.
- Orientation: Match the inlet and outlet markings to the actual water direction.
- Tube routing: Avoid kinks, sharp bends and tension at connectors.
- Support: Secure the housing and route hoses clear of stored items and moving drawers.
- Access: Leave room to isolate, disconnect and service the filter later.
Don't use extra force to correct a mismatched connection. Dismantle it under isolation and identify the problem instead.
Restore water under observation
Keep the outlet configured as the manufacturer directs, then restore the supply gradually while watching the connections. Stop immediately if a joint leaks. Once the assembly remains dry, perform the prescribed initial flush, followed by the full commissioning checks below.
Australian drinking-water guidance discussed in the PFAS review identifies incorrect orientation, excessive flow, stagnant cartridges, neglected tubing and pressure loss from clogging as practical pitfalls. Correct assembly is only part of avoiding those failures.
The accompanying video provides another visual reference; use your model's manual for the connection details.
Flush, Test and Troubleshoot the Installation
Water coming out of the tap doesn't mean the installation is complete. Commissioning means checking the assembled system against its instructions and recording what you observed.
Flush the cartridge using the manufacturer's specified volume and procedure. Don't substitute a guessed running time, and don't treat clear-looking water as proof that flushing is complete. Keep the flow within the filter's operating limit throughout.
Check performance without inventing a target
Dry the housing and every connection, then inspect while the outlet is running and again after it closes. Check the joints with the system under its normal static pressure, not just while water is flowing. Where appropriate, observe operation while other household outlets are in use, without deliberately exceeding equipment limits.
A calibrated container and timer allow you to measure outlet flow. Divide the collected volume by the collection time, use consistent units and compare the result with the manufacturer's operating requirements. A pre-installation measurement is useful context if you recorded one.
Acceptance check: A dry joint, acceptable flow and completed flush are observable results. Pleasant taste alone doesn't verify contaminant reduction.
Diagnose the symptom before changing parts
- Dripping at a joint: Isolate and depressurise before checking alignment, insertion depth and seal condition. Reset a connection only by the manufacturer's method, and replace damaged parts rather than repeatedly tightening them.
- Low flow: Check valve position, kinked tubing, cartridge seating and the outlet for restrictions. Review the cartridge's service condition before blaming supply pressure.
- No flow: Confirm the water path, cartridge orientation and any selector position. Check that packaging or a transport component hasn't been left in place where the instructions require removal.
- Unusual taste or odour: Verify flush completion and correct cartridge identification. If the issue persists or suggests a broader water-quality concern, stop using that outlet for drinking until you've obtained appropriate advice.
- Flow that improves only briefly: Investigate recurring restrictions, incoming sediment and cartridge capacity. Repeated cartridge changes without investigating the cause aren't a diagnosis.
Consult the manufacturer when the hardware behaves differently from the manual. Call a plumber for leaking supply connections, uncertain pressure conditions or faults involving the existing tap and plumbing.
Finish with a commissioning record covering the installation date, cartridge model, completed flush, observed flow, leak checks and any unresolved limitation. Keep photographs of the assembled connections and retain the manual. If you can't confirm the system operates within its requirements, record that it hasn't been accepted for normal use.
Maintain the Filter and Prevent Common Failures
The cartridge label gets attention at purchase time, but the service routine determines whether the household keeps using the system as intended. A neglected taste filter can become ineffective, and not every filter removes or inactivates harmful microorganisms, as NSW Health's drinking-water and public-health guidance makes clear.
That's why maintenance belongs with the plumbing records, not on a reminder you'll lose when you change phones. Store the cartridge details somewhere accessible to whoever will perform the next service.
Set replacement limits you can follow
Record the installation date, rated capacity and specified replacement interval. Replace at the earliest applicable limit, whether that's elapsed time, litres treated or a pressure-drop condition requiring attention under the manufacturer's instructions. Don't wait for an unpleasant taste if the scheduled limit has already arrived.
- Cartridge service: Use the specified replacement and follow the housing's cleaning and sanitising procedure.
- Seals and connectors: Inspect for damage, dampness and movement. Replace compatible components rather than compensating with extra tightening.
- Tubing condition: Check for kinks, rubbing and strain caused by cupboard contents.
- Unused outlets: Flush a rarely used cold tap before drinking or cooking, and follow the filter manufacturer's return-to-service instructions after prolonged absence.
Look beyond the filter housing
A standard carbon cartridge shouldn't be treated as a microbiological barrier unless its certification explicitly demonstrates that function. Likewise, a system selected for a verified health-related contaminant needs the service discipline associated with that treatment claim, not merely a taste check.
Older tap components and supply lines also deserve attention when investigating lead, sediment or other persistent concerns. Lead and manganese questions may require water-quality advice and plumbing investigation rather than another cartridge purchase.
For Melbourne households and tradespeople, practical water filter servicing guidance can support an organised maintenance routine. Keep compatible spare seals or fittings identifiable by specification, but don't stock substitutes just because they appear similar.
A serviceable filter is one someone can isolate, open, clean and reconnect without dismantling the cupboard around it. Preserve that access as carefully as you preserve the replacement schedule.
Finish With a Filter Service Checklist
Household filtration isn't a new Australian habit. The ABS reported that 28.6% of households used a water filter in 2007, compared with 18.2% in 1998, in its household water-source and filter-use findings. Those historical figures establish familiarity, not a reason every kitchen needs the same treatment.
The useful outcome is a system you can explain and maintain. Keep the following checklist with the installation record, especially if another household member or tradesperson will handle future servicing.
Confirm the purchase and installation
- Treatment objective: Have you identified what you want to improve, rather than buying for an undefined purification claim?
- Performance evidence: Does the certified claim cover that objective and the exact cartridge or system?
- Connection compatibility: Are size, format, tubing and sealing method confirmed?
- Operating conditions: Have flow and pressure requirements been checked against the proposed setup?
- Safe preparation: Is the shut-off route known, with the required tools and fittings ready?
- Assembly: Are orientation, support, routing and service clearance correct?
Leave a usable service record
- Commissioning: Has the specified flush been completed, every joint checked and outlet flow observed?
- Limitations: Have unresolved faults or operating concerns been documented rather than overlooked?
- Replacement planning: Are the cartridge date, capacity and next scheduled service recorded?
- Rarely used outlets: Does the household know the flushing and return-to-service procedure?
- Spare components: Are replacement seals and fittings matched by specification, with their details retained?
If a check remains unanswered, resolve it before treating the job as complete. Ask the supplier to confirm a cartridge specification, have a plumber identify uncertain hardware or obtain appropriate water-quality advice.
Correct selection, compatible connections and continued maintenance are the practical objective. A health-related claim needs verified evidence, while uncertain plumbing needs assessment rather than an improvised adapter. That approach gives the next person servicing the sink something more useful than a filter housing and a vague recollection of when it was installed.
Ring Hot Water offers drinking-water filtration systems, genuine spare parts and fitting categories including John Guest and brass threaded connections. Visit Ring Hot Water with your filter model, connection specifications and photographs to enquire about suitable parts and Melbourne service options before ordering.